Showing posts with label recipes. Show all posts

Tuesday, August 11, 2009

Tasty Testing, Ambrosia Salad, & upcoming trips!

Please head over to my new blog at TheUrbanHousewife.com, where you'll find this post & more!
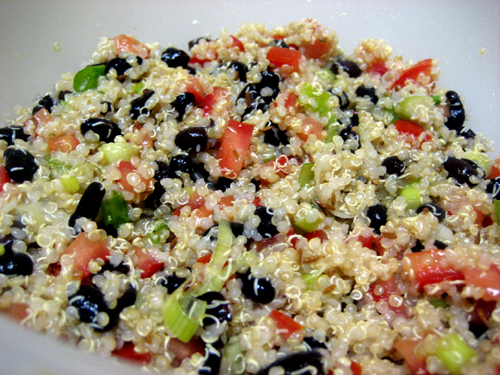
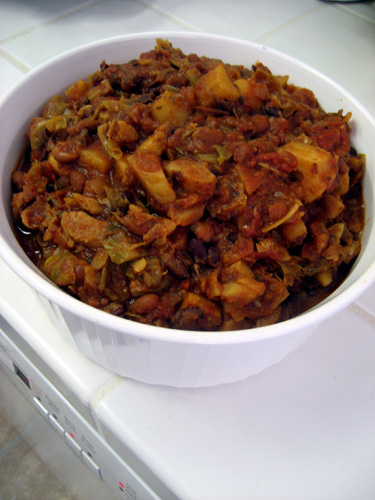
Thank you everyone for the well wishes on my last post. I am finally feeling better, I'm back in the kitchen & ready to share my culinary adventures! Lately, I have been devoting time to recipe testing for two of my favorite people, superstar cookbook authors, Isa & Terry! I've mentioned the upcoming Vegan Latina book from Terry before & trust me, it's going to be phenomenal (check out The Sisters Vegan post), but did you know Isa has another book coming up as well? Hot off the heels of Vegan Brunch, will be a whole foods, weight conscious cookbook, low on fat, but high on flavor! I've made quite a few dishes already like the Caribbean Black Eyed Pea Curry with Plantains, a Potato & Corn Salad that gets a kick from Chipotle Peppers & other dishes all varied & delicious! In the photos are a Quinoa Salad with beans, veggies, & toasted Cumin Seeds, plus some chewy & delicious Scarlet Barley topped in Mushroom & Cannelini Paprikas! Trust me, you would never know this was a low-fat book, everything has been fabulous!

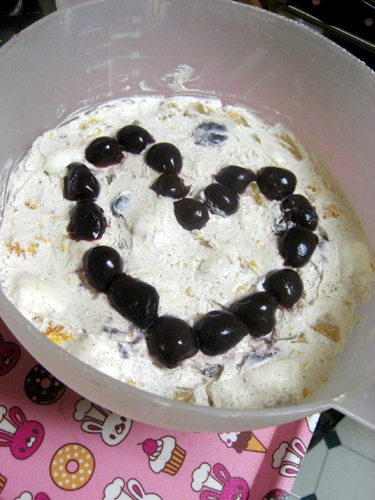
In a previous post, I mentioned I had made vegan Ambrosia Salad for a potluck at my house. Well, based on the comments & emails it seems people want to make this trashy treat for themselves! There's not much of a recipe, much like the original, it's all about opening processed food containers & pouring them in to a bowl, but hey, you asked for it, so you get it! I used organic canned fruit, but if you want to stick to the classic version, go for syrupy fruit cocktail & maraschino cherries!
Vegan Ambrosia Salad
1 box of Soyatoo Whipped Cream
1 Vanilla Bean or Vanilla extract (optional)
1 can of Fruit Cocktail, drained
1 jar or can of Cherries, drained & sliced
1 bag of Dandies Vegan Marshmallows
1 cup of shredded coconut (optional, I served mine on the side, as an add-in.)

In the bowl of a stand mixer, combine Soyatoo Whipped Cream & vanilla. Whip for a few minutes, until it reaches a fluffy consistency.
Combine the fruit in a large bowl, fold in the whipped cream mixture, then the marshmallows & coconut (if using).
Chill for at least 2 hours before serving. (Yes, it's that easy.)

In travel news, Ryan, Strummer, & I are off to Southern California this weekend to see relatives. Hopefully, I'll have some tasty food to report on when I get back! Also, in late September, I'm headed to Austin, TX & would love to meet up with my Texas vegan pals, so get in touch!

In uber exciting news.. we're going (back) to JAPAN! Ryan & I recently celebrated 11 years as a couple & to reward ourselves, we booked a flight to Tokyo in October. Calling all vegans in Japan! We want to meet you! Of course, suggestions on where to go are very much welcome. We went to Japan on our honeymoon 4 years ago in October, as you can see in the photo from a Purikura booth, but we'd like to see new things this time. We will likely be in Tokyo, Kyoto, & Nara, but are open to suggestions! Bring 'em on!


Tuesday, July 7, 2009

Cookie Contest Winner, 2009 Veggie Awards, & a Cornbread Burger Bun recipe!

Please head over to my new blog at TheUrbanHousewife.com, where you'll find this post & more!

A week has passed & many entries for the Bountiful Vegan Intention Cookie giveaway have come in. The answers have ranged from the funny, "my cookie name would be Wesley Snipes", to the more serious, "..I would be Ahimsa (non-violence), as that is my guiding principle.", to the downright delicious, "I'd be a sustainability cookie! It would be a renewable cookie that you never finished"! I had a great time reading all the answers! Thank you for the entries, but the moment of truth is here! The randomly selected winner is...karaxcupcake who said, "I'd be an Ants in the Pants cookie. Would most likely contain caffeine.". Congratulations Kara! Please email me melisser AT theurbanhousewife.com to claim your prize!

In other news, voting for the 2009 Veggie Awards by VegNews Magazine is here! I am honored to say I have been nominated for "Favorite Blog" alongside some excellent bloggers, & of course, there are many deserving people who were not nominated. VegNews ups the ante with the voting by making it so you can win awesome prizes by completing at least 50% of the survey. I found it easy to vote with friends like Isa Chandra Moskowitz, Terry Hope Romero, Chicago Soydairy, & more being nominated, but even if you just want to vote for little old me on page 5 of the survey, I won't be mad at ya!

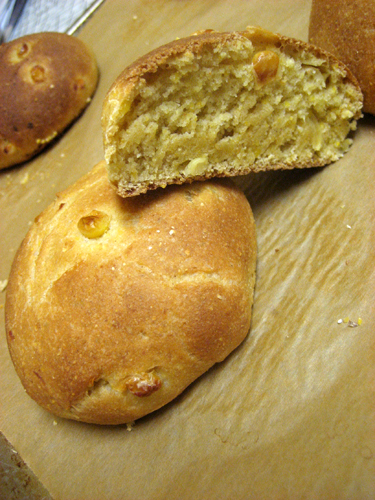
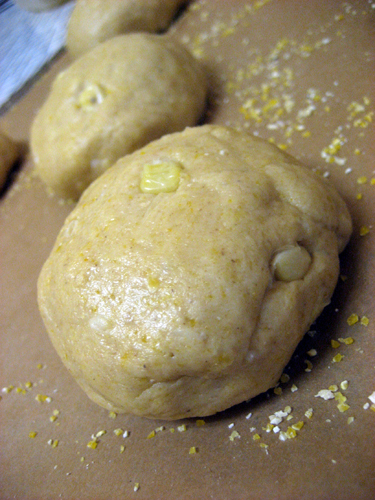
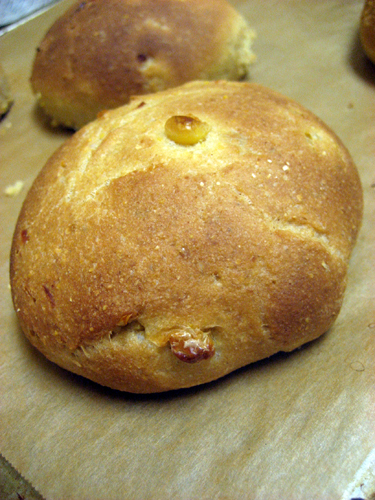
It's been awhile since I've posted a recipe, but inspiration struck a few weeks ago & I thought I would share it with you. We love cornbread & homemade burger buns around here, so why not combine the two & make a Cornbread Burger Bun? This is definitely a cross between a fluffy burger bun & cornbread, so don't go expecting it to be a rounded version of traditional cornbread. While I used a stand mixer, all steps can be done by hand as well.

Cornbread Buns
Ingredients:
1/2 cup warm water
1 1/4 tsp active dry yeast
1 cup whole wheat pastry flour, divided
1 cup all-purpose flour, divided
1 tsp salt
3/4 cup cornmeal
2 tbsp Earth Balance, melted (oil also works, but changes the flavor slightly)
2 tbsp agave nectar
1/2 cup corn, fresh or frozen
2 tbsp coarse cornmeal (optional)

Instructions:
Combine the water & yeast, gently stir, & set aside for 5 to 10 minutes, or until the yeast forms a foamy layer on top of the water.

In the bowl of a stand mixer, combine 1/2 cup of the whole wheat pastry flour & 1/2 cup of the all-purpose flour.

Add the yeast mixture & mix with the dough hook attachment on low speed until combined.

Add the salt, cornmeal, melted Earth Balance, agave nectar, & corn, continue mixing on medium-low speed until combined.

With the mixer running, add the remaining 1/2 cup of whole wheat flour & 1/2 cup of the all-purpose flour. Continue mixing until you have a slightly sticky dough that pulls away from the sides of bowl.

Let the mixer knead the dough for about 1 minute, then transfer the dough to a large bowl.

Cover the bowl with plastic wrap, then with a dish towel & leave it to rise in a warm place until it has doubled (about 2 hours).

Line a baking sheet with parchment paper or a Silpat & sprinkle with coarse cornmeal, if using.

Turn the dough out onto a work surface & knead for a few seconds, then divide the dough into 6 balls to make the rolls.

Cover the rolls with a kitchen towel & leave them to rise a second time for 1 to 1 1/2 hours, or until they puff up noticeably.

Preheat oven to 375 degrees.

Bake for 20 to 25, switching the positions of the baking sheets halfway through.

Remove the buns from oven when rolls are golden on top, browned on the bottom & sound hollow when tapped on the base.

Let them cool on a wire rack for a bit, then slice them open & enjoy!

These would be great with homemade veggie burgers, but we kept the Southern theme going & filled them with black eyed peas & tender Collards Greens with tomatoes! While the recipe may seem time consuming, it's a very hands off process & a great Sunday afternoon project. The recipe yields 6, but could easily be doubled, as they freeze well! I hope you enjoy them as much as we do!

Tuesday, January 27, 2009

Miso–Butternut Squash Soup by Nava Atlas of Vegan Soups and Hearty Stews for All Seasons

Please head over to my new blog at TheUrbanHousewife.com, where you'll find this post & more!

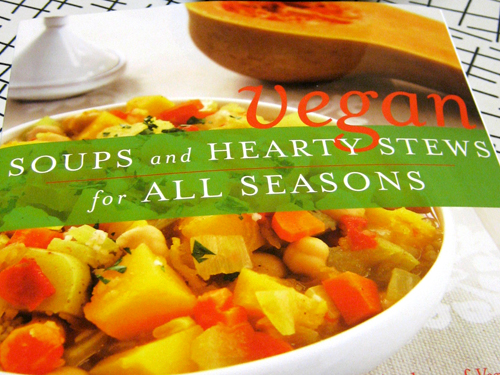
When Nava Atlas, the author of a plethora of vegetarian cookbooks approached me to be a stop on her "Blog Tour" for the re-release of one of her books, I was more than happy to oblige. Vegan Soups and Hearty Stews for All Seasons is now in its 4th edition, previously having been titled Vegetarian Soups for All Seasons, & it now contains color photos, plus a beautiful new cover! As someone who eats seasonally, I was thrilled by the convenience of having the recipes divided by availability at my local Farmers Market!

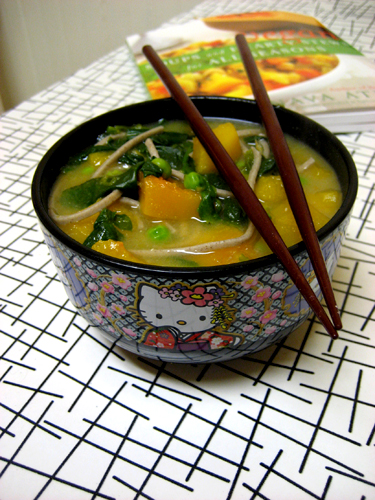
Today just happens to be the release date, so I'm posting a recipe from Vegan Soups and Hearty Stews for All Seasons I made just the other day. The book couldn't have arrived on my doorstep at a better time. Struck with a case of the sniffles, I opened the package & found myself making Miso Butternut Squash soup shortly after. This mild, delicious soup hit the spot & did a fabulous job chasing away my winter blues! The recipe is straight from the book, the only change I made was to steam my butternut squash, so from here I'll let Nava's words take it away..

Miso–Butternut Squash Soup
with soba noodles and spinach
6 servings
Once you've got the squash baked, this Japanese-style soup comes together quickly, and is as pleasing to the eye as it is to the palate. Use chopsticks for "slurping" the noodles.

1 small butternut squash, about 1 pound
3 cups water
4 ounces soba (buckwheat noodles), broken in half
1/2 to 1 teaspoon grated fresh ginger, to taste
One 15-ounce can low-sodium vegetable broth
5 to 6 ounces fresh baby spinach, stemmed and rinsed
1 cup frozen green peas, thawed
2 to 3 tablespoons miso
Freshly ground pepper to taste

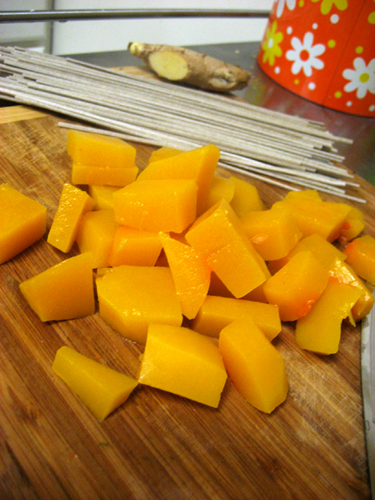
Place the squash in a microwave-safe container. Microwave for 8 minutes, or until it can be easily pierced with a knife but is still firm. Or, if you are using the oven for baking other foods, you can bake the squash in the oven. Cut it in half, wrap in foil, and bake at 375 or 400 degrees for 30 to 45 minutes, or until tender. Either way, this step can be done ahead of time. Let the squash cool until it can be easily handled. Split it in half, remove the seeds and fibers, and scoop the flesh away from the skin. Cut into large dice and set aside until needed.

Bring the water to a simmer in a soup pot. Add the soba and ginger and cook until the noodles are al dente.

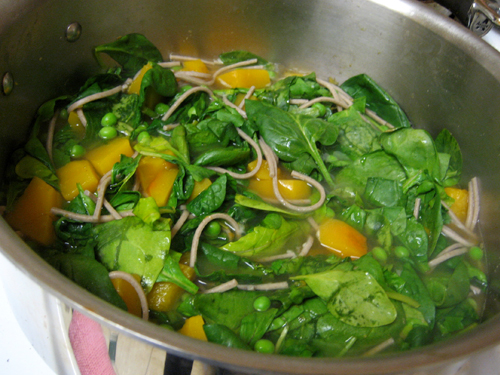
Add the broth, spinach, and peas, and diced squash. Cook just until the spinach is wilted but still bright green and everything is well heated through.

Dissolve the miso in 1/3 cup warm water and stir into the soup, then taste. If you'd like to add more miso, dissolve a small amount in a little warm water before adding. Season with pepper and serve at once.

If you're a soup or stew fan like myself, hop over to Amazon & pick up Vegan Soups and Hearty Stews for All Seasons!

Tuesday, December 23, 2008

Overnight Apple Butter & Happy Holidays!

Please head over to my new blog at TheUrbanHousewife.com, where you'll find this post & more!

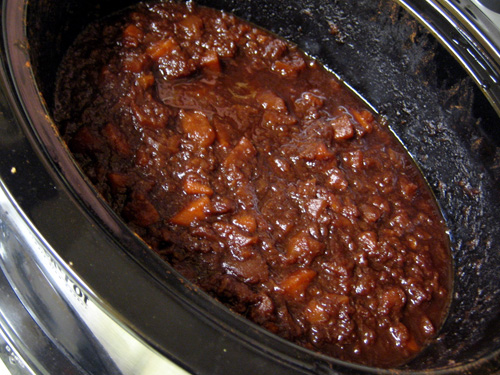
The holidays are officially here & some of us are still scrambling to find gifts or collect ingredients for the dish we want to impress family & friends with. Homemade gifts are a great way to show you care, not to mention they're environmentally friendly! I decided to try my hand at canning for the first time & opted to employ my crock pot to make Apple Butter for my friends & family. For those of you looking for a last minute gift, this may be the perfect match!

Overnight Apple Butter
Ingredients:
4 1/2 lbs of apples, peeled, cored, & sliced (I used a mix of Granny Smith, Red Granny, Pink Lady, & Fuji)
1 cup Brown Sugar
1 cup Agave Nectar
1/4 cup Apple Cider Vinegar
2 Tbsp Cinnamon
1 Tbsp Vanilla Extract (I love Nielsen Massey!)
1/4 tsp Cloves (optional)

Instructions:
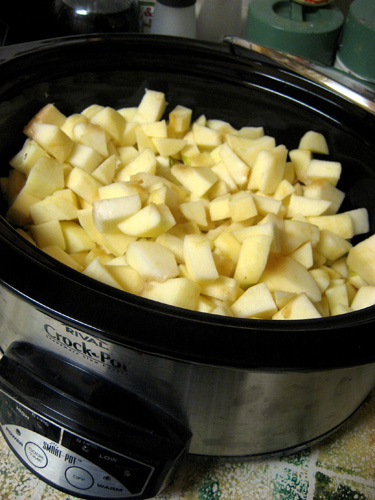
In a crock pot, add your sliced apples, then the rest of your ingredients.Mix well to cover apples in the spices & liquids.

Cook on low for 8 hours, until apples are soft & fragrant.

Using an immersion blender, puree the mixture until smooth or desired texture.

Turn the crock pot to high, remove the lid, & allow the mixture to simmer until thickened & reduced. This can take anywhere from 1 1/2 to 3 hours, depending on your desired thickness.

A wooden spoon should be able to stand in the mixture & when you put a dollop on a plate, liquid should not seep out.

This yields 6 to 8 cups of apple butter & is perfect for half pint mason jars.

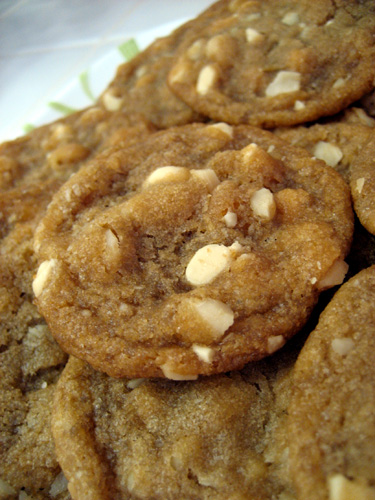
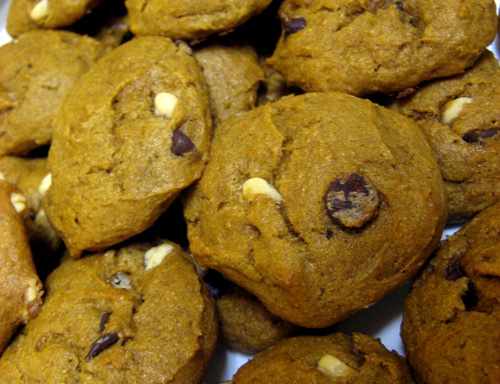
My holiday celebrations have already started with a weekend trip to Southern California to see Ryan's family. At Ryan's request I made, White Chocolate Macadamia Nut Cookies. They turned out flatter than I'd hoped, but that didn't stop them from being devoured, especially by Ryan & his friend Josh. Once I acquire more white chocolate chips, I'll have to make these again with some adjustments.

For dinner I made a dish I have been loving lately, Chipotle Chili With Sweet Potatoes And Brussels Sprouts. The recipe originally appeared on Isa's blog over at the PPK, but I love it so much, she gave me permission to re-post it on Eat. Drink. Better. This is an excellent dish to share with those with a fear of vegan food, as it lacks processed vegan ingredients & substitutions. Just tell everyone you made sweet potato chili & watch people gobble it up!

I hope everyone has a happy holiday season, whatever they may be doing. I'm not sure I'll get another post in before the new year, but I am look forward to another year of blogging & reading about delicious vegan food throughout all the seasons!

Tuesday, December 16, 2008

Gluten Free Pumpkin Chocolate Chip Whoopie Pies with Cream Cheese Filling

Please head over to my new blog at TheUrbanHousewife.com, where you'll find this post & more!

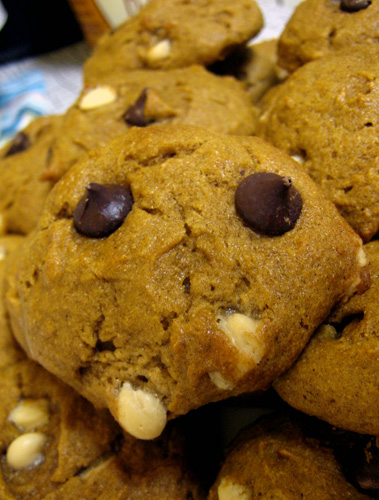
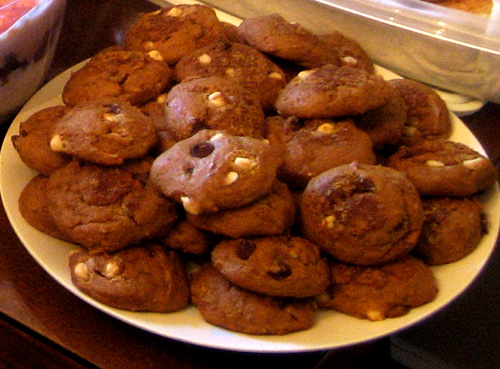
It all started with a sweets swap & a few attendees with a gluten allergy. As vegans, we all know what it's like to be the one left without options, so I decided to try to remedy that for the gluten free folks & try my hand at baking for them. It was my first time baking gluten free & luckily, it turned out! Moist, cakey pumpkin cookies were produced & in the end I decided they were best suited for whoopie pies. There's a lack of assembly photos, but regardless of that I wanted to post these for Kittee because she rules at life! While I used a mix of White Chocolate Chip & Dark Chocolate Chips, you can use whatever you have on hand. These would also be great with some chopped nuts!

Gluten Free Pumpkin Chocolate Chip Whoopie Pies
Ingredients:
2 1/2 cups Bob's Red Mill All-Purpose Gluten-Free Baking Flour
1 tsp Baking Soda
1 tsp Baking Powder
1 tsp Xanthan Gum
1 Tbsp Cinnamon
1/2 tsp Nutmeg
1/4 tsp Allspice
A pinch of Salt

1/2 cup Earth Balance, melted
1 1/2 cups Sugar
1 1/4 cups Pumpkin Puree, canned or fresh
1 Tbsp Ener-G Egg Replacer mixed with 2 Tbsp Water
1 tsp Vanilla extract

2/3 cup Chocolate Chips (I used 1/3 cup white, 1/3 cup dark)
Optional: 1/4 cup Chopped Nuts of your choice

Instructions:
Preheat your oven to 350 degrees & prepare a sheet pan with a Silpat, parchment, or non-stick spray.

In a medium bowl, mix together the dry ingredients.

In a large bowl, mix together the wet ingredients.

Add the dry mixture to the wet, being careful not to overmix.

Fold in the chocolate chips & (optional) nuts.

On your prepared sheet pan make even scoops of your dough, leaving space for spreading. The dough will be soft & slightly tacky, so a small disher / scoop works well for this.

Bake at 350 degrees for 18 to 20 minutes, or until the edges are slightly browned.

Allow to cool completely before assembly.

Cream Cheese Filling
Ingredients:
1/4 cup Earth Balance, softened
1/4 cup Tofutti Better Than Cream Cheese, softened
2 cups Confectioners Sugar, sifted
1 tsp Vanilla extract


Instructions:
Beat together Earth Balance & Tofutti cream cheese until combined.

In small batches, add in the confectioners sugar until everything is smooth.

Beat in vanilla extract.

Assembly:
Take your cooled pumpkin cakes & pipe in or smooth on a large dollop of cream cheese filling, add another cake on top. Voilà, Whoopie Pies!

This recipe yields 12 to 16 whoopie pies, depending on your scoop size.

Tuesday, August 12, 2008

British Bulldog's Custard Berry Tart with Biscuit Crust

Please head over to my new blog at TheUrbanHousewife.com, where you'll find this post & more!

Okay, I'll admit it, in my childhood, I was a fan of WWF wrestling. Saturdays were filled with body slams & beefy men in tights; Hulk Hogan, Macho Man Randy Savage, Rowdy Roddy Piper, the Ultimate Warrior, Jake the Snake, Bret "the Hitman" Hart, I watched them all while yelling at the television. Needless to say, my mother was less than thrilled. What does this have to do with vegan food you ask? Well, Natalie from Bake & Destroy is currently holding a "Sugar Slam!" competition of wrestling inspired desserts & I decided to whip up an entry.

When coming up with ideas, many things danced through my head, "cupcakes with snakes popping out!", "something with blood!" & then I decided to go another route. I never make tarts. In fact, this is my first tart with a tart pan that has been sitting here a few months. Enter, the British Bulldog! I think it's safe to say he would like a tart! My trip to London had provided me with some goodies to incorporate in my dessert, namely McVitie's Digestive Biscuits (only the LIGHTS are vegan) & Bird's Custard Powder. With summer's wonderful berries flooding the farmers market & my loot from London, I set out to create a tart fit for a wrestler!

British Bulldog's Custard Berry Tart with Biscuit Crust
Ingredients:
Crust:
2 cups Digestive Biscuits, Rich Tea Biscuits, or Hob Nobs (approximately 14 biscuits), crumbled.
6 Tbsp Earth Balance, melted.
a pinch of cinnamon (optional)

Custard:
2 cups soy milk
2 Tbsp sugar
2 Tbsp Custard Powder (try Bird's or Orgran)
1/4 cup lemon juice
1/2 tsp arrowroot or cornstarch
1/2 tsp vanilla extract
1/2 tsp lemon extract
1/2 vanilla bean, split & scraped. (optional)

1 cup strawberries, sliced in to strips.
1 cup blueberries

Instructions:
For the Crust- Preheat the oven to 375 degrees & spray a 9 inch tart pan with non-stick spray.

Over medium heat, melt 6 tbsp of Earth Balance.

Crumble biscuits until you've reached 2 cups & place them in a bowl with the cinnamon.

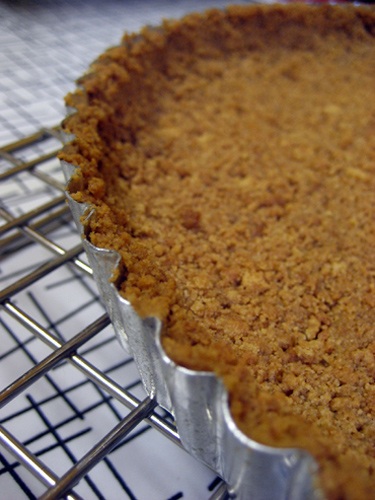
Add the Earth Balance until a soft crumbly dough forms & then press it in to the bottom & sides of the tart pan.

Bake the crust for 10 minutes & let it cool completely.

For the Custard- Combine 2 tbsp of the soy milk, the sugar & custard powder, whisk to combine, forming a paste & removing all lumps.

In a saucepan, combine the paste & the rest of the soy milk. On medium heat, bring the mixture to a simmer & let it thicken, stirring occasionally.

Whisk the lemon juice & arrowroot together, once again making sure there's no lumps. Add the lemon juice to the thickened mixture & bring it back to a simmer, continue to thicken the mixture.

Once thickened, turn off the heat, stir in the extracts & vanilla bean. Place the custard in a bowl with a layer of plastic wrap on the top of the custard, so a skin doesn't form. Place in the refrigerator until it is completely cooled, it will firm up quite a bit once cool.

Assembly- Once everything has cooled, add the custard to the crust, filling all the way to the edges. Make sure you don't leave too much custard in the middle, or your fruit will sink in & disappear.

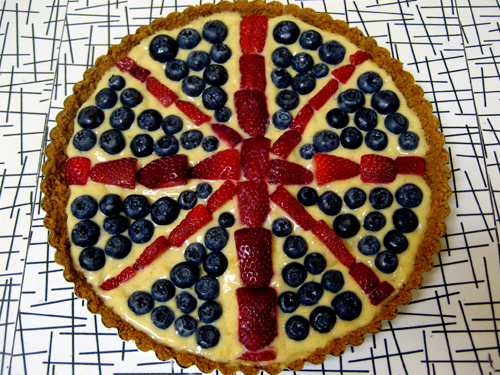
To make a Union Jack; From top to bottom & across the sides form a cross with your strawberries, then with thinner sliced berries, make an "X" shape.

Use the blueberries to fill in the vacant spaces, leaving visible custard on either side of the strawberries to make the white lines.

Place your finished tart in the refrigerator to bring everything up to the same temperature or be a rebel & dig in! I think the British Bulldog would opt to eat it straightaway!
My Notes: This makes a light, fluffy custard that would be good with any sort of fruit. Many grocery stores carry Bird's Custard Powder, but if you don't want to use it, you can try a flour or cornstarch thickened recipe for custard or pastry cream. Most biscuits or cookies would suitable for the crust, I just love a good digestive & was thrilled to find the McV's Lights to be vegan. Many other brands of digestives are vegan, just read the label!

On another note, I was surprised to find out I am nominated for a 2008 Veggie Award from VegNews Magazine for "Favorite Veg Blog". Make sure you go vote, not only so the veggie voice is heard, but you may win some fabulous prizes! Ooh, prizes! Anyway, I am honored that VegNews thought of my humble little blog & I'm nominated with some truly fabulous bloggers & friends.

Thursday, June 26, 2008

Strawberry Rhubarb Cobbler for Everyday Dish TV & a VegBloggy Award!

Please head over to my new blog at TheUrbanHousewife.com, where you'll find this post & more!

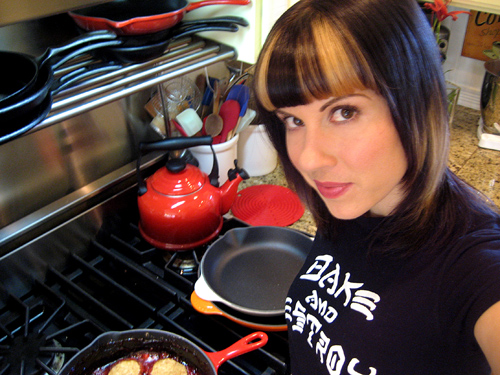
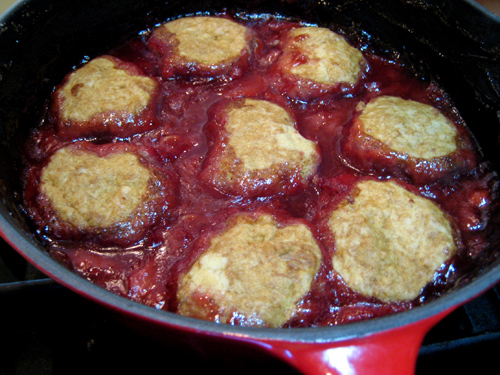
It's been ages since I've posted a recipe, but today I have a recipe & a video as well! While In Portland, I was lucky enough to hang out with Julie Hasson & tape a segment for Everyday Dish TV. I've been watching her show & reading her blog for quite some time, so I was thrilled to be invited on. Here I am on set after I taped my segment, of course I'm rocking my Bake & Destroy shirt! I decided to make a dish that's easy to make & perfect for your current Farmers Market bounty, a Strawberry Rhubarb Cobbler!


Strawberry Rhubarb Cobbler

Filling:
1 1/2 cups organic granulated sugar
1/3 cup cornstarch
5 cups fresh sliced strawberries
3 cups sliced rhubarb
2 tbsp maple syrup
Pinch of salt

Biscuit topping:
2/3 cup cold Earth Balance margarine or vegetable Shortening
2 cups all-purpose flour
1/4 cup organic granulated sugar
2 tsp baking soda
Pinch of salt
3 - 4 tbsp ice water
1 tsp vanilla

Preheat oven to 400°F.

For the Filling: In an oven-safe, deep skillet, mix together sugar and cornstarch. Add the rhubarb and strawberries, mixing until coated. Add a pinch of salt, maple syrup & mix well.

Place the skillet on the stove top over medium heat, and bring to a simmer. If necessary, reduce heat slightly to maintain simmer. Let fruit cook until glossy and thickened, stirring as needed, about 10 minutes.

For the Biscuits: In a large mixing bowl, add flour and Earth Balance. Using a pastry blender, cut margarine into the flour in pea-sized pieces.

Gently stir in sugar, baking soda, and salt. Add vanilla. Gradually add ice water, a tablespoon at a time, mixing until dough comes together.

Shape the dough into a log, and break into 8 to 10 pieces.
Form small, flat biscuits and place them evenly over the top of the bubbling fruit.

Transfer skillet to the preheated oven. If you do not have an oven-safe skillet, cast iron pot, or pan, transfer your filling into a 9x13 pan, placing the biscuits on top.

Bake for 20 to 30 minutes, or until center is firm and biscuits are golden. Let it cool & thicken before serving, then enjoy!


By the way, I am thrilled (& surprised) to say I was given a VegBloggy Award by VegNews magazine. I'm a fan of their publication, so it was nice to see my name on their pages. I'll be attending the VegNews Music / VegBloggy issue launch party tomorrow night & may even have something to do with the desserts at the festivities. Rumor has it, I'll be seeing some of my friends & fellow award winners at the party, it's sure to be a fun night!

Monday, April 14, 2008

Rebecca's Cakes; the Vegan Cake Girl & an Jaffa Orange Drizzle Cake recipe!

Please head over to my new blog at TheUrbanHousewife.com, where you'll find this post & more!

Before departing for London, I was surprised to receive a note on Flickr asking if I'd like to sample some vegan baked goods while overseas. Being a gal with an intense sweet tooth & a love for reviewing what the vegan world has to offer, how could I say no?! Enter Rebecca; the Vegan Cake Girl. Shortly after I arrived in London, I received a notice that a box was waiting for me at the post office. My jaw dropped when I spied the large box she had sent to me; it contained a selection of baked goods from breakfast items to cakes, not to mention candies, cute little pins, & suggestions on where to find tasty vegan goods in the UK.

When looking at her website you'll see this is just a small sampling of what Rebecca does. Cupcakes, cakes, trifles, puddings, brownies, cheesecakes, & even Petit Fours are on the menu! Additionally, she does cake mixes for the less baking inclined & catering for events. Here are my thoughts on what I sampled by Rebecca's Cakes, once again using my dessert rating system.

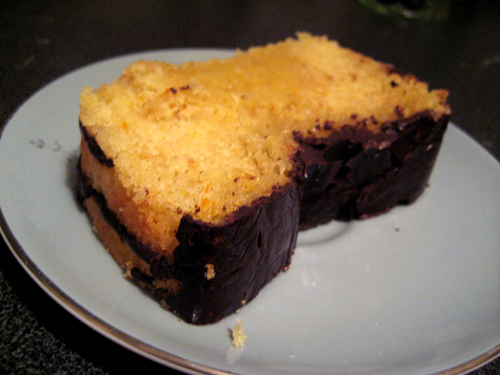
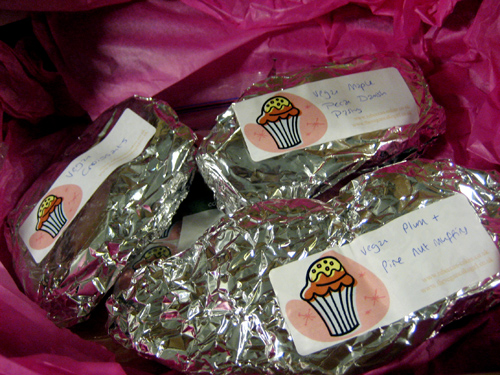
Jaffa Orange Drizzle Cake- This sweet, fluffy, moist cake was just a bit bready & had wonderful marbled gooey parts. The orange zest throughout was lovely & it was topped with a delicious chocolate shell. It had a great flavor & my friends raved about it so much, I sent them one as a thank you for letting us stay with them! 4 ½ stars

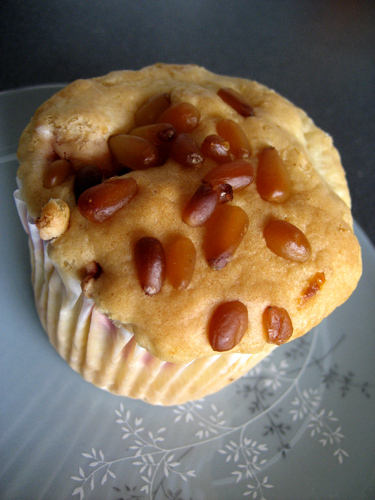
Plum & Pine Nut Muffins- A fluffy & not-too-sweet muffin with soft pieces of plum baked in & toothsome pine nuts on top. It made for an interesting combination & the sweetness seemed to mainly come from the plums. I can't say this is a flavor combination I would pick out for myself, but nonetheless, it was not a bad muffin at all. 3 stars


Sticky Toffee Pudding
-
This bready, not super sweet cake contained dates & was spongy & soft. The butterscotch sauce was very sweet & had a nice burnt sugar taste. I couldn't help but steal a bit of the topping to put on Swedish Glace ice cream & it was great! I found the cake tasted best when covered in the sauce & soaked through, which made it pretty addictive! 3¾ stars

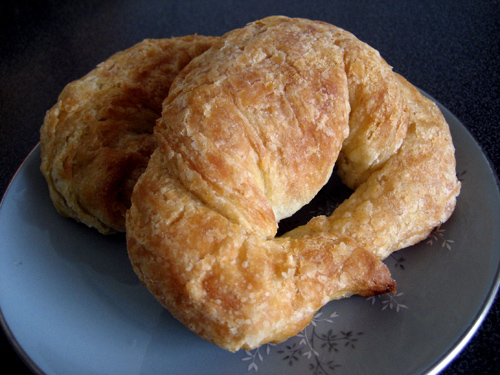
Croissants- "Buttery" & a bit wheaty & mild with a nice outer flakiness & fluffiness, while the inside was a bit more bready & savory tasting. It was nice, but I'm not sure I was ever a croissant person, so I wasn't bowled over. They reminded me a bit of the flaky dinner rolls that come in tubes. 3 stars

Maple Pecan Danish Pastry- A nice, hearty wheat, yet sweet & fluffy pastry with great maple flavor & a tasty drizzle over the top. The center contained whole pecans which Ryan loved & wished for more of. This would be very nice warmed up! 3¾ stars

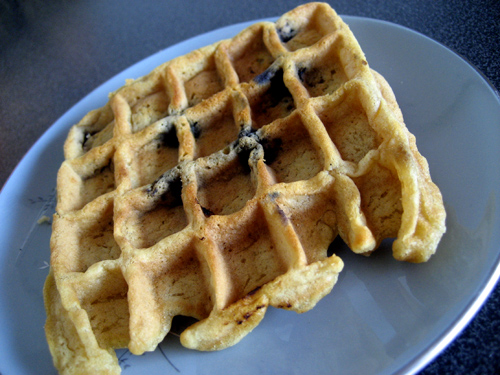
Blueberry Waffles- These hearty, but still light blueberry laced waffles were perfect reheated in the toaster to start my mornings off. They had a nice wheat taste, almost like a digestive biscuit, & inspired me to make some waffles for freezing at home for a quick breakfast! 4 stars

Rebecca was kind enough to share the Jaffa Orange Drizzle cake recipe for my readers, so now you can enjoy it as much as I did! The measurements are in grams or ounces, so break out those kitchen scales or use a conversion calculator. Trust me, it's worth it!

Rebecca's Cakes Vegan Jaffa Orange Drizzle Cake
Ingredients:
140g / 5oz Vegan Margarine or Shortening, softened.
200g / 7oz Self Rising Flour (If you can't find this, use all purpose flour & increase the baking powder by 2 tsp.)

1 1/2 tsp Baking Powder
200g Sugar
Ener-G Egg Replacer equivalent to 3 eggs (4 1/2 tsp Ener-G with 6 Tbsp water, blended)
6 Tbsp Soy or Rice Milk
Zest of 1 Big Juicy Orange

Instructions:
Preheat the oven to 325 degrees (160 degrees centigrade).

Mix all of the ingredients using an electric mixer until they're light & fluffy
.
When you lift the paddle the batter should drop easily, if it's a little stiff, add a bit more milk.

Pour the batter into a greased & lined loaf tin.

Bake for 40 to 45 minutes.


When the cake is cooked take it out of the oven & pierce all over with a skew
er or cake tester & immediately make the Orange Syrup.

Orange Syrup
the Juice of 1 Big Juicy Orange
50g/2oz sugar

Bring the juice of the orange & the sugar to a boil in a small pan.

Pour over the cake immediately & leave to cool completely. If you try & cut it while warm the syrup will make the cake fall a
part!!

Once the cake has completely cooled, melt 50g/2oz of the finest, darkest chocolate you can find & drizzle it over the cake!
Et Voilà!

Overall, I was thrilled with my chance to taste test this array of lovely baked goods. If you live in UK, have a friend there, or are taking a trip there, do yourself a favor & order some vegan desserts from Rebecca. She ships within the UK, has pick up available in North London, & is as sweet as her treats!

Thursday, March 6, 2008

Southern Fried Tofu, Make Your Own Marshmallows, & Europe!

Please head over to my new blog at TheUrbanHousewife.com, where you'll find this post & more!

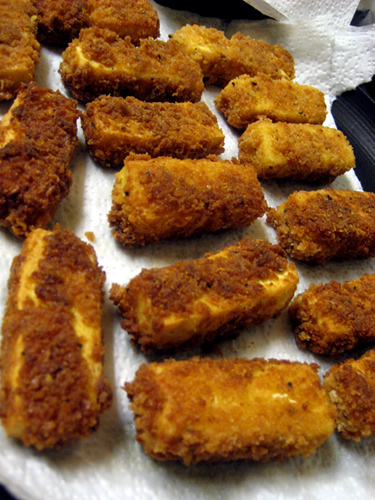
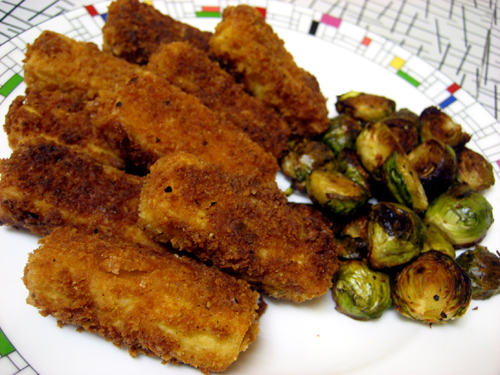
Sometimes you just crave fried food! Inspired by a poster on the PPK, I decided I needed some breaded & fried goodness. I had fresh tofu from Hodo Soy Beanery on hand, so I thought it would be the perfect recipient for this flavorful coating. I hate to admit it, but I was a fan of a certain fried fast food chain back in the day, mainly for the mashed potatoes, but regardless, this was far superior to anything I consumed from them!

Southern Fried Tofu
Ingredients:
1/2 cup flour
1/2 cup panko
2 Tbsp nutritional yeast
1 tsp garlic powder
1/2 tsp onion powder
1/2 tsp paprika
1/2 tsp smoked paprika
1/2 ts. salt
1 tsp pepper
2 Tbsp dijon mustard (yellow is fine as well.)
3 Tbsp water
1 Tbsp baking powder
1 to 2 blocks of firm or extra firm tofu, preferably pressed, sliced in to strips.
Oil for frying (Canola or vegetable are ideal.)

Instructions:
In a large bowl, mix the flour, panko, nutritional yeast, garlic powder, onion powder, paprika, salt, & pepper.

In another bowl, whisk the mustard in to the water. Add 2 Tbsp of the dry mixture & stir.

Add the baking powder to the dry mixture & incorporate.

Use one hand to dip the strips of tofu in to the mustard mixture, then transfer them in to the dry mixture, using your other hand to coat & press in the seasoning. Ideally, you'll have a "wet hand" & a "dry hand".

Fry the coated tofu on medium high heat, turning repeatedly, until nicely browned & crispy.

Move them to a paper towel or other absorbent surface until done frying.

Serve & enjoy!

My Notes:
I used fresh tofu, so it didn't have to be pressed. If you have access to fresh tofu, I think it was really lovely with this, as it's lighter than packaged tofu, making this not feel heavy. I hate having tons of extra coating left over, so this should get you through 2 blocks of tofu easily with less waste than many other recipes. You could also use this on mock chicken or seitan, of course!

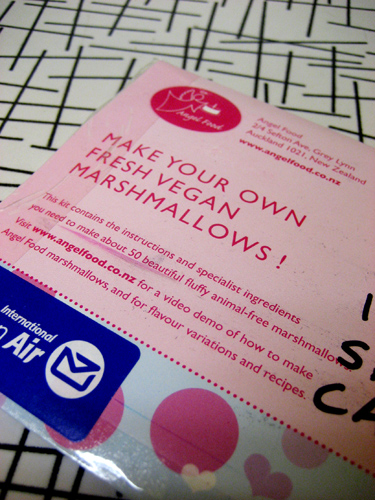
I always enjoy receiving mail & you can imagine my excitement when an envelope landed in my mailbox declaring, "Make Your Own Fresh Vegan Marshmallows!". Alice from Angel Food was kind enough to send me a marshmallow making kit & I was more than willing to try it out!

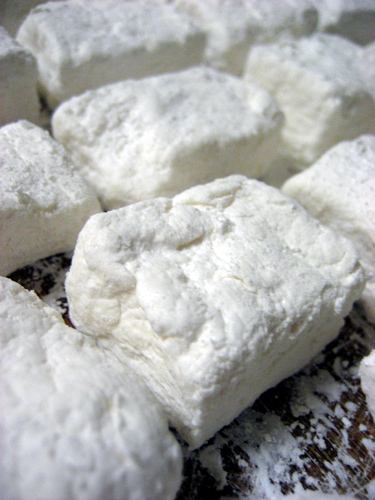
While the process isn't difficult, I found myself a bit daunted by the use of a stand mixer & two pots on the stove. Luckily, it was a breeze & I found myself moving right along without issue. The kit comes with two packets of powder & you supply water, sugar, syrup, vanilla, & starch for the outsides. The kit makes a whopping 50 marshmallows, so be prepared to share with loved ones!

Vegan marshmallow making has been something that's escaped many, myself included, but with this kit, I was finally able to make my own fluffy little sugar pillows! They were softer & sweeter than Sweet & Sara & I found I liked them best after a bit of refrigerator time to firm them up. I took them to an impromptu vegan picnic in Dolores Park last Sunday & they were quickly devoured along with the Hazelnut Cake Truffles I made. One thing I found out the hard way though, is these aren't for toasting over a flame, I'm still nursing blisters & burns on 4 fingers after my attempt awry.

If you want to try your hand at making marshmallows or don't have access to other vegan marshmallows out there, consider trying these out! The kit comes from New Zealand & with shipping to the US is well under $10. Check out Angel Food for details.

On Monday, Ryan & I are headed to Europe for 16 days!
London, Berlin, & Prague will be our destinations & I cannot wait to go on eating adventures & report back. Suggestions on food to try & things to see are always welcome & if you're in one of these places & want to meet up, get in touch! Until next time! xo.

Wednesday, February 27, 2008

Jackfruit "Carnitas" Tacos!

Please head over to my new blog at TheUrbanHousewife.com, where you'll find this post & more!

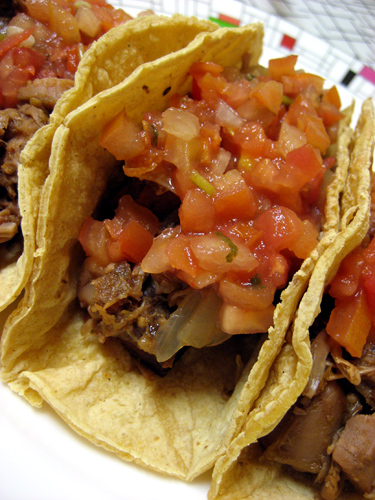
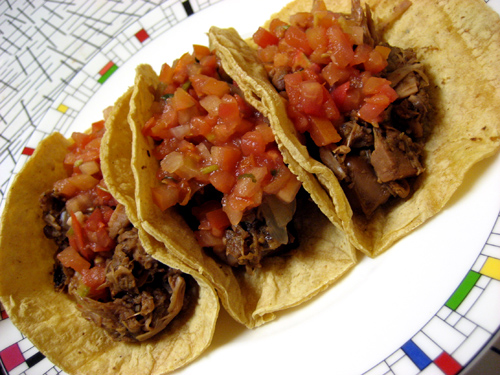
After consuming Jackfruit Tacos in Los Angeles at Pure Luck, I knew I had to go home & try my hand at making them. I've been meaning to post this recipe for some time, as it's become a staple in my kitchen, especially for parties where people can serve themselves! Jackfruit is commonly used in Southeast Asian cuisine & can be found in most Asian markets in cans. You may also find it at Indian grocers or other specialty stores. It's important that you get young jackfruit in water or brine, as it is mild & almost flavorless, where ripe jackfruit is sweet. Not only in jackfruit delicious, it's very low in calories & takes well to any seasoning. On the PPK, people have been smothering it with BBQ sauce & using in on sandwiches.

I use a crockpot for this recipe, I love being able to throw it together in the morning, leave for the day, & only need to heat a tortilla up to have dinner after a long day! This can also be simmered on the stove top, but may not have the same depth of flavor from all day slow cooking. You'll notice there's not exact measurements for the ingredients, as this is very adaptable. You can make 1 can or 4! I find one can serves 2 people, but this is also a great re-heat the next day, so don't be afraid to make more!

Jackfruit "Carnitas" Tacos
Ingredients:
Young Green Jackfruit, canned, in brine or water, not syrup.
Salsa Verde (Trader Joe's brand is ideal.)
Lime juice
Onion, cut in to large pieces.
Garlic, pressed or minced.
Chile Powder
Cumin
Pepper
Smoked Paprika
Cayenne Pepper
Oregano

Instructions:
Drain & rinse the jackfruit throughly. With your hands, press the moisture out of each piece & add it to the crock pot or your stove top pot.

Take each of your spices & season each piece of jackfruit. Once covered, use your hands to coat each piece in the spices on all sides.

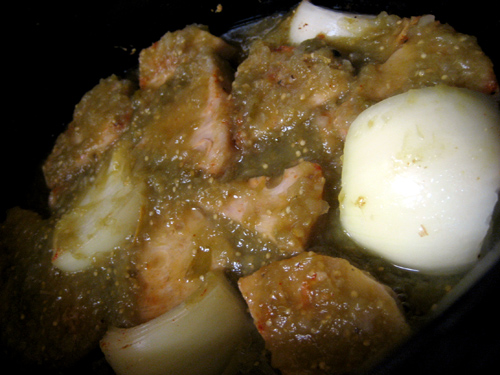
Add the chopped onion & garlic to the crock pot & cover the seasoned jackfruit with the Salsa Verde. It doesn't have to be completely covered, just make sure there's enough liquid in the bottom & spoon a bit on top of all the pieces. (I tend to use a little over half a jar per can of jackfruit.)

Squeeze lime juice over the top of everything (I use a 1/2 lime per can of jackfruit), turn on the crock pot & let it go!

I like to cook this in the crock pot for 7 to 8 hours, if possible, but it can be done in as little as 1 hour. If cooking this on the stove top, let it simmer for at least 1 hour, preferably 2, stirring occasionally.

After the jackfruit is cooked, it will have changed colors & be a nice browned color. I remove the onions & any large garlic pieces from the mixture before serving, but it's up to you!

Serve the jackfruit in corn tortillas with some additional salsa on top & a squeeze of lime juice or any other toppings you enjoy!